

Adding live chat to a Webflow site means pasting a JavaScript embed snippet into the site's custom code settings, either in the global head or footer code section for a site-wide widget, or into a specific page's custom code panel for narrower placement.
Webflow's built-in custom code panels make this integration genuinely simple compared to platforms that require a plugin or app marketplace, since Webflow was designed from the start to support this kind of direct script embedding.
The main decision to make isn't really how to add the code, that part is straightforward, it's where to add it: site-wide for consistent chat coverage everywhere, or page-specific for a more targeted placement on select pages only.
For most businesses, a site-wide widget makes the most sense, but a few common scenarios, like wanting chat only on pricing and contact pages, genuinely benefit from the more targeted page-specific approach instead.
This guide covers what to prepare before starting, adding the widget site-wide through global custom code, adding it to specific pages only, customizing the widget for your Webflow site, and troubleshooting the most common setup issues.
What You Need Before Adding Live Chat to Webflow
Before adding live chat to Webflow, you'll need edit access to the site's project settings, a live chat account with an available JavaScript embed snippet, and a plan for whether the widget should appear site-wide or only on specific pages.
Webflow project edit access
You'll need at least Designer or Editor-level access to the Webflow project, since adding custom code requires permission to modify project or page settings.
If you're working on a client's Webflow site, confirming this access level in advance avoids a mid-setup blocker.
A live chat account with an embed snippet ready
Locate the JavaScript tracking snippet from your live chat account's settings, meant specifically for manual website installation, before starting the Webflow-side work.
Having this snippet copied and ready keeps the Webflow integration focused purely on placement, not also locating the correct code at the same time.
A plan for site-wide vs page-specific placement
Decide upfront whether the widget should appear on every page or only on a targeted subset, since this determines which of Webflow's two code-placement methods to use.
Most businesses default to site-wide, reserving page-specific placement for a deliberate reason, like wanting chat only on high-intent pages such as pricing or contact.
Adding Live Chat Site-Wide via Global Custom Code
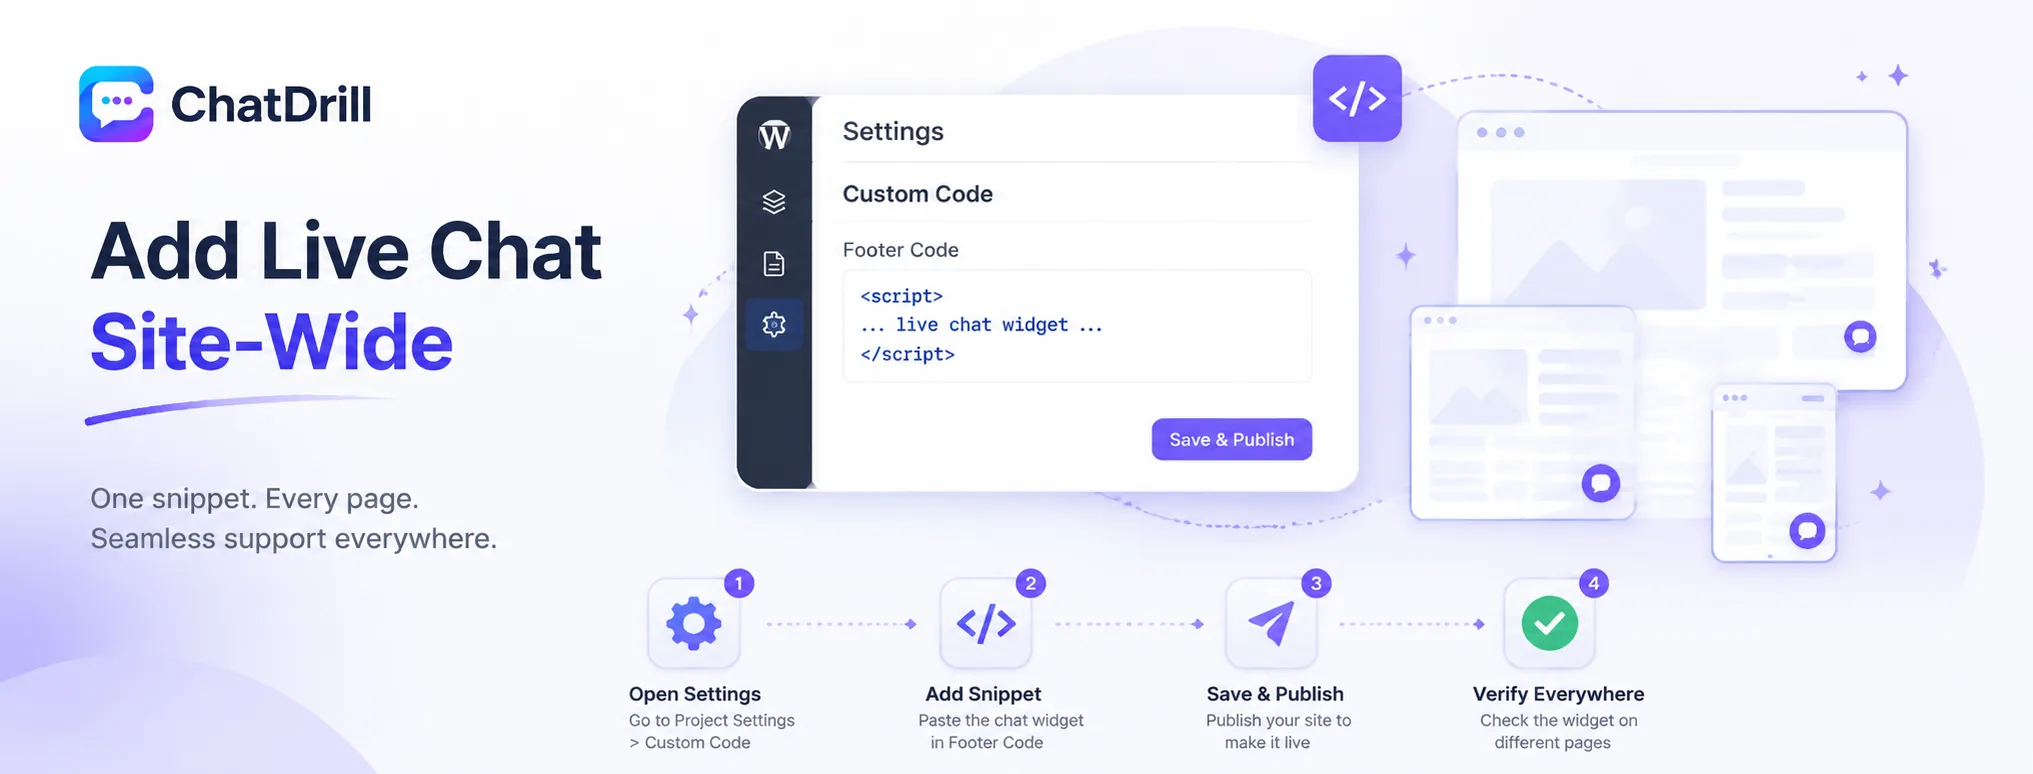
Adding the chat widget site-wide involves pasting the embed snippet into Webflow's project-level custom code settings, which applies the widget consistently across every page on the site automatically.
Step 1: Open your project's custom code settings
From the Webflow Designer, go to your project's Settings, then the Custom Code tab, which contains fields for adding code to every page's head or footer.
This project-level setting is what makes a site-wide widget possible without needing to touch each page individually.
Step 2: Paste the chat widget snippet into the footer code field
Paste your live chat provider's tracking snippet into the footer code field specifically, which is the generally recommended placement for a chat widget script.
Placing the script in the footer rather than the head avoids it blocking the initial page render while the rest of the page loads.
Step 3: Save and publish the site
Save the custom code changes, then publish the site, since custom code changes in Webflow only take effect on a live, published site, not in the Designer preview alone.
Forgetting this publish step is a common reason the widget appears to be missing immediately after adding the code.
Step 4: Verify the widget appears across different pages
Visit a few different pages on the published site, homepage, an interior page, confirming the widget appears consistently everywhere as expected.
Testing on both desktop and mobile views at this stage catches any device-specific rendering issues before they become a lasting problem.
Adding Live Chat to Specific Pages Only
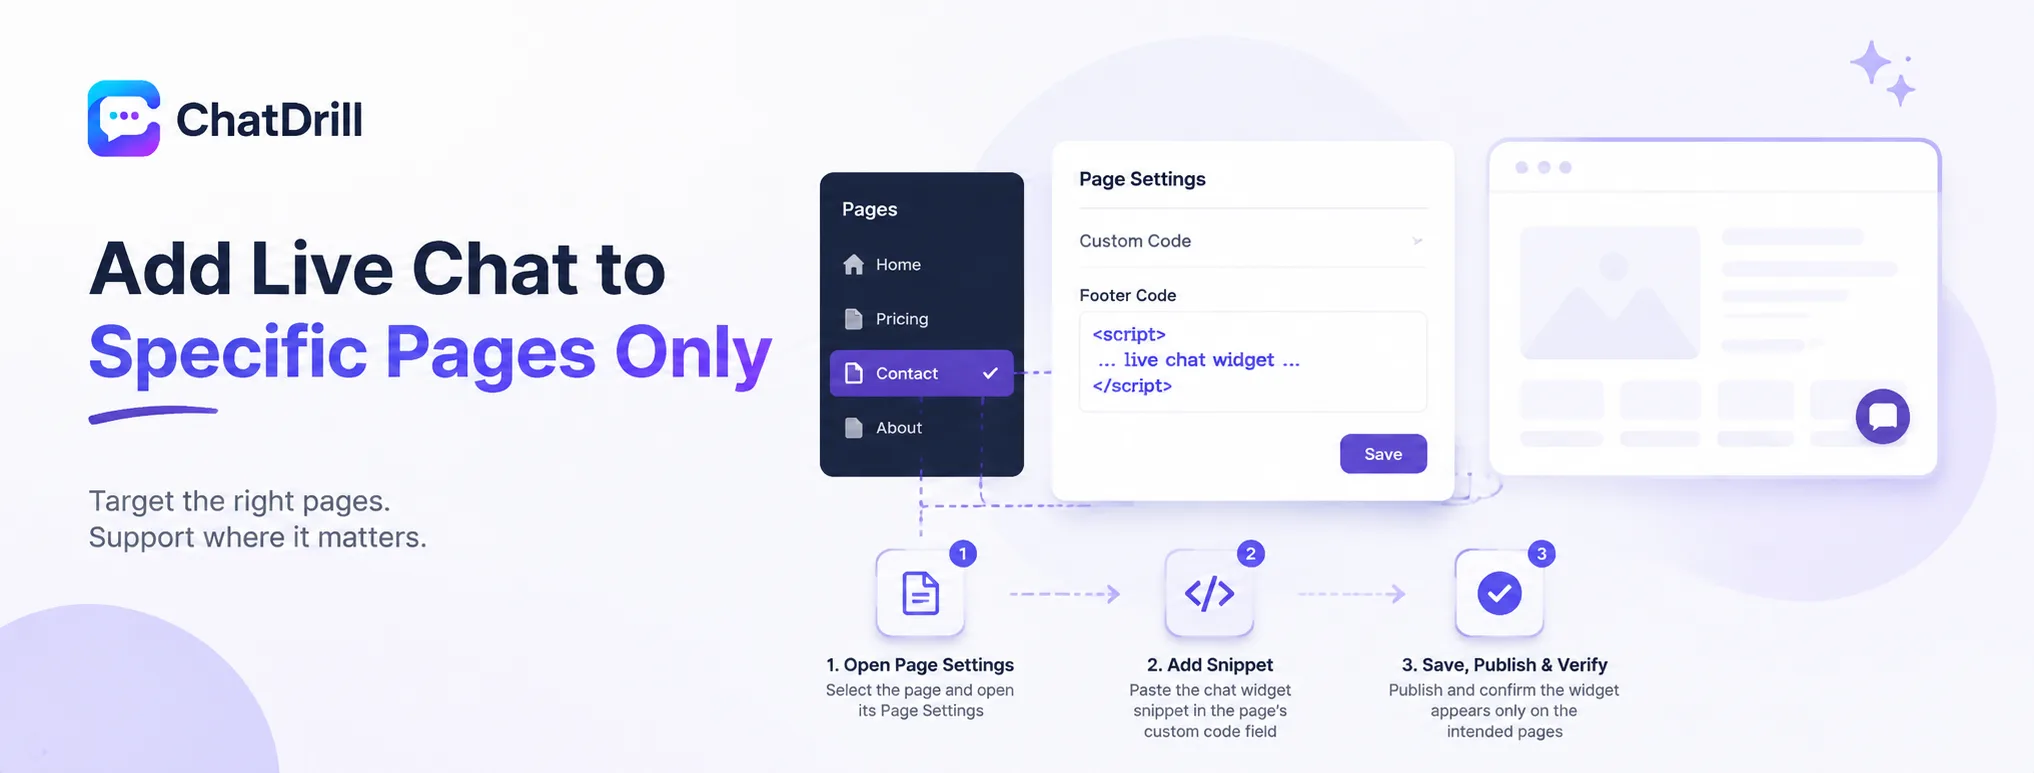
For a more targeted placement, the chat widget snippet can be added to an individual page's custom code settings instead of the site-wide project settings, restricting the widget to that page alone.
Step 1: Open the specific page's settings
In the Webflow Designer's Pages panel, select the target page, then open its Page Settings, which includes its own custom code fields separate from the project-wide ones.
This page-level custom code option exists specifically to support scenarios where a script shouldn't apply to every page on the site.
Step 2: Paste the snippet into the page's custom code field
Paste the same chat widget tracking snippet into this page's dedicated custom code field, following the same placement logic as the site-wide method.
Repeat this step individually for each additional page where the widget should appear, since page-level code doesn't automatically extend to other pages.
Step 3: Save, publish, and verify on the target pages
Save the page settings and publish the site, then verify the widget appears specifically on the intended pages and does not appear elsewhere.
Checking a page that intentionally wasn't given the snippet confirms the targeting is working correctly, not just that the widget shows up somewhere.
Customizing the Widget for Your Webflow Site
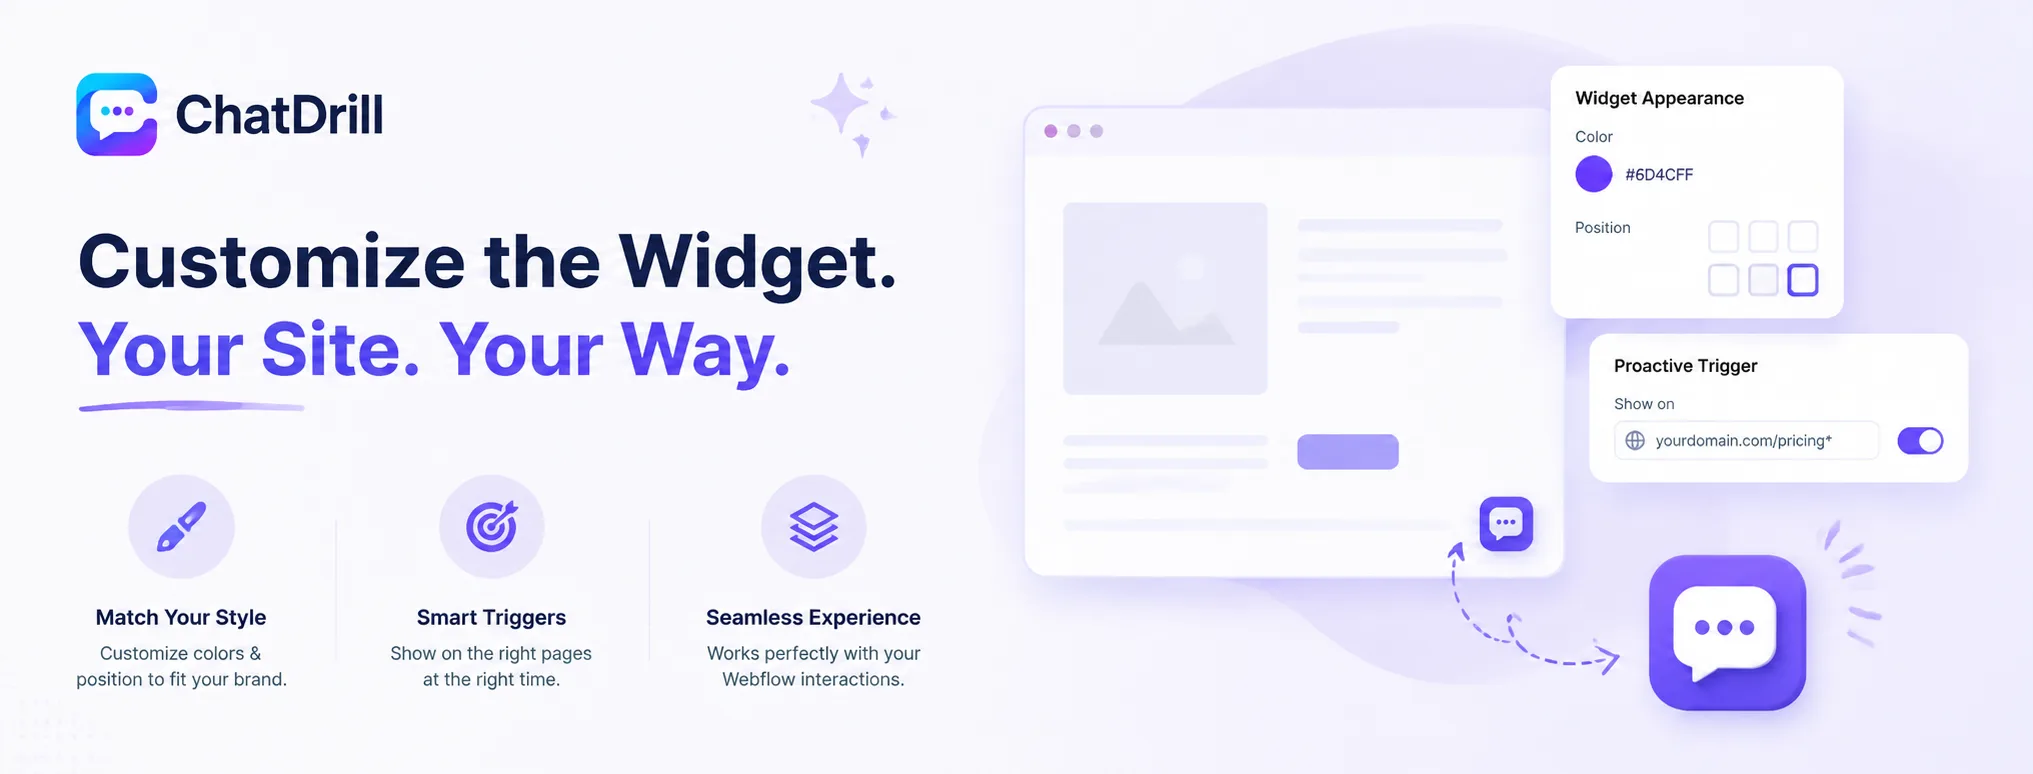
Once live, the widget's color, position, and proactive triggers are generally customized directly from your live chat provider's dashboard, without needing to change anything further inside Webflow itself.
Matching widget style to your Webflow design
Most chat platforms let you set the widget's color and corner position from their own dashboard settings, making it easy to match your Webflow site's visual design.
This customization happens entirely outside Webflow, meaning design changes to the widget don't require republishing the Webflow site itself.
Setting proactive triggers for key Webflow pages
Configure a proactive trigger to open the widget automatically on a specific page, like a pricing or demo-request page, by specifying that page's URL pattern in your chat provider's dashboard.
This works cleanly with Webflow's clean URL structure, making it straightforward to target a trigger to exactly the intended page.
Coordinating widget placement with Webflow interactions
If your Webflow site uses custom interactions or animations, testing the chat widget alongside them confirms there's no visual overlap or conflicting z-index issue.
This is worth checking specifically on pages with heavier custom interactions, since those are the most likely spots for an unexpected visual conflict to appear.
Troubleshooting Common Webflow Chat Widget Issues
The most common Webflow chat widget issues are the widget not appearing because the site wasn't republished after adding code, the widget showing on unintended pages, and a visual conflict with custom Webflow interactions.
Widget not appearing after adding the code
Confirming the site was actually published after the custom code was added is the most common fix, since Webflow's Designer preview doesn't reflect custom code changes until publish.
If the widget still doesn't appear after publishing, double-checking the snippet was pasted into the correct field, footer rather than head, resolves most remaining cases.
Widget showing on unintended pages
If the widget appears on pages where it shouldn't, check whether the snippet was accidentally added at the project level instead of, or in addition to, the page level.
Removing the project-level snippet if page-specific placement was the actual intent resolves this cleanly.
Visual conflicts with Webflow interactions
A custom Webflow interaction or animation can occasionally overlap visually with the chat widget, usually resolved by adjusting the widget's z-index from your chat provider's dashboard settings.
Testing on the specific page where the conflict appears, rather than assuming a site-wide fix is needed, helps isolate whether the issue is page-specific.
Adding Live Chat to a Webflow Site With CMS-Driven Pages
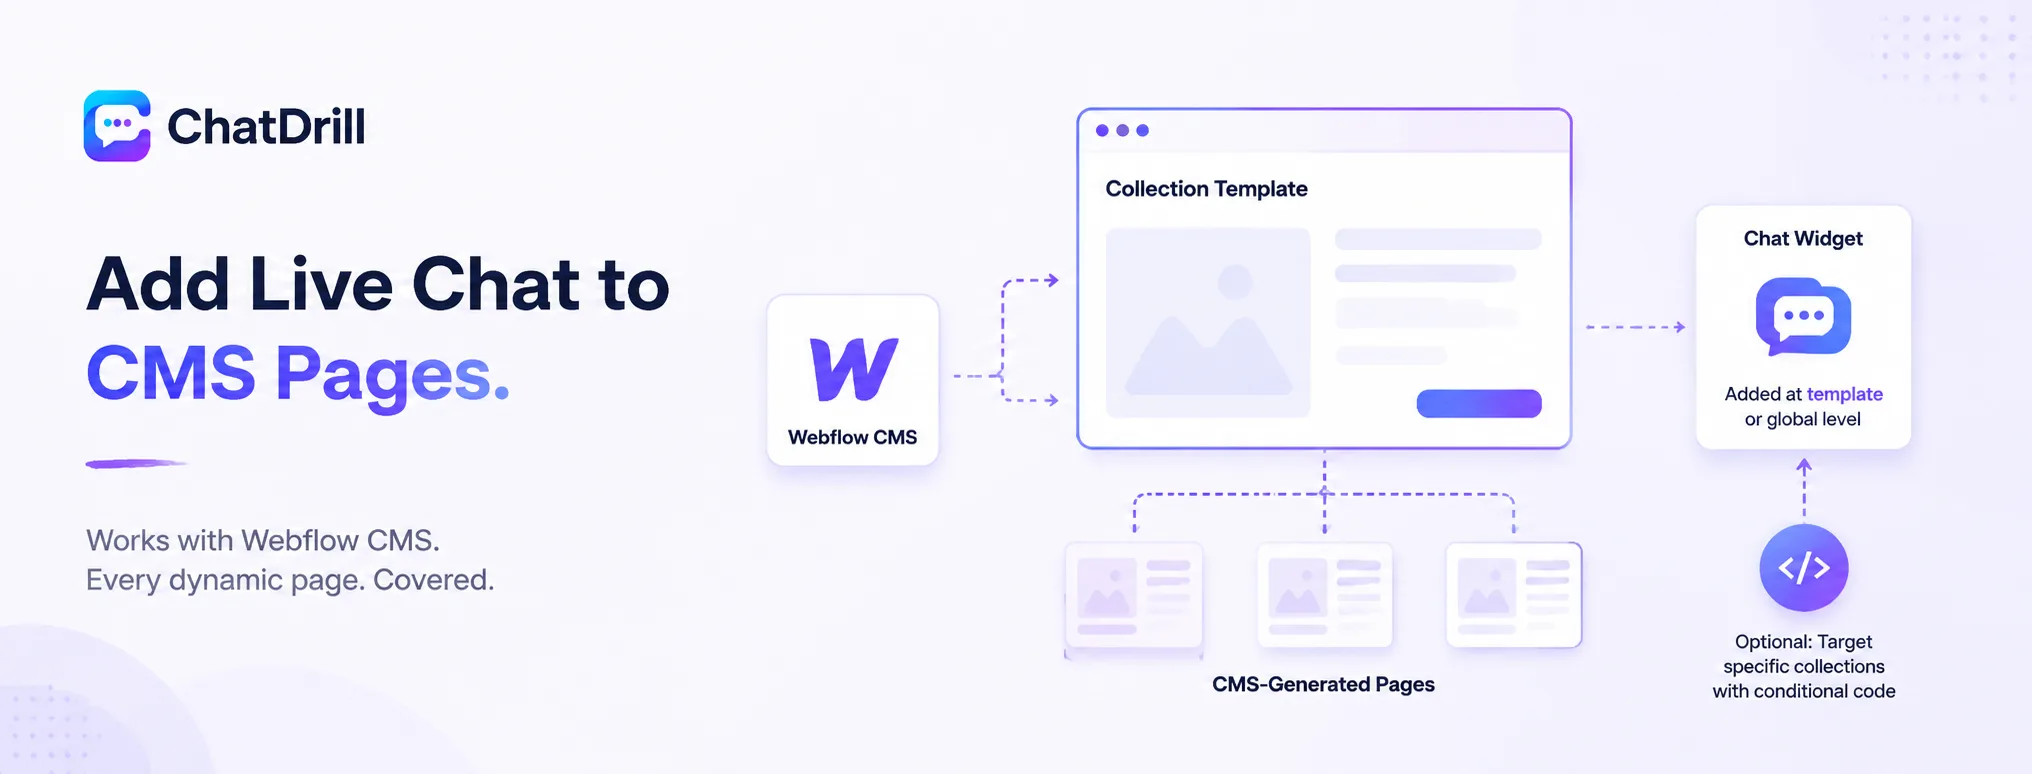
A Webflow site using the CMS to generate dynamic collection pages needs the chat widget added at the collection template level, since page-specific custom code doesn't apply to individually generated CMS items.
Why CMS pages behave differently from static pages
CMS collection pages in Webflow are generated from a single template, meaning custom code added to one individual item's page settings won't apply to the rest of the collection.
Adding the chat widget site-wide through the project's global custom code settings sidesteps this issue entirely, since it applies to every page regardless of whether it's static or CMS-generated.
Targeting the widget to specific CMS collections only
If the widget should appear only on certain CMS-driven pages, like product or service detail pages, a small conditional script checking the page's URL pattern can achieve that targeting.
This requires slightly more custom code than the basic site-wide method, worth considering only when genuinely necessary rather than as a default approach.
Using Webflow's Conditional Visibility With Live Chat
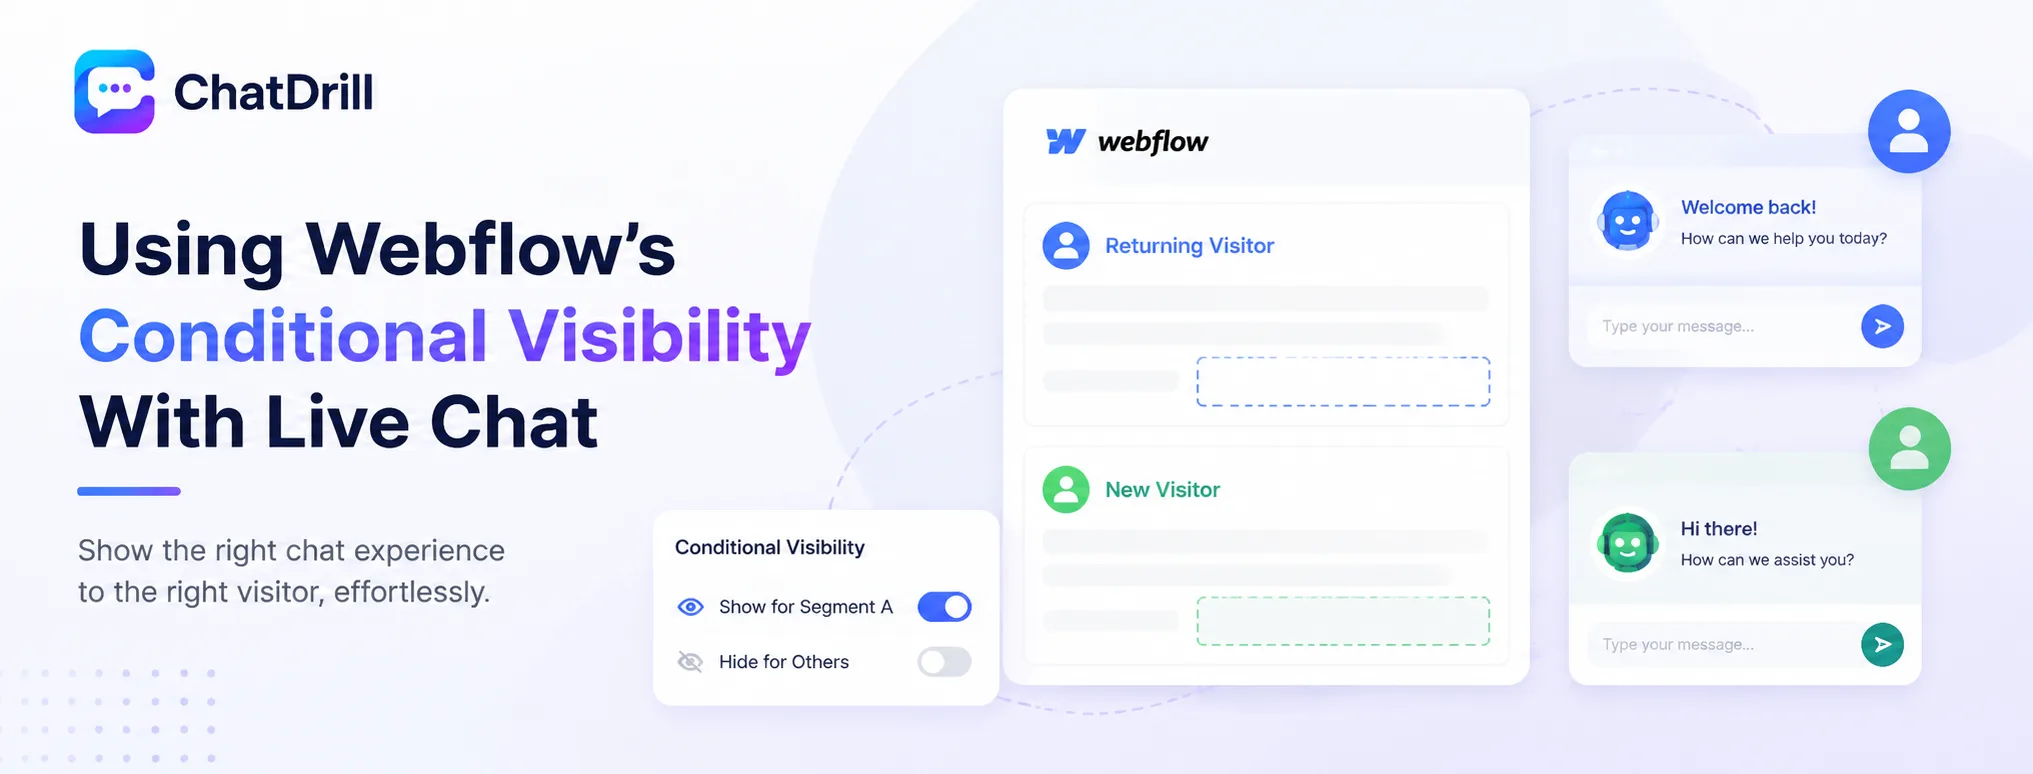
Combining Webflow's conditional visibility features with a chat widget's own display rules lets a site show different triggers or greetings based on visitor segment, without needing custom development work.
Coordinating Webflow interactions with widget triggers
If a Webflow page uses conditional visibility to show different content to different visitor segments, setting a matching proactive trigger in the chat provider's dashboard keeps the messaging consistent.
This coordination is manual, worth documenting clearly so future updates to either the Webflow page or the chat trigger stay in sync with each other.
Testing across different visitor scenarios
Testing the widget's behavior specifically for each visitor segment a page is designed to show different content to confirms the chat experience matches the intended messaging.
This is worth doing methodically for each segment rather than assuming the default behavior automatically adapts to Webflow's conditional content changes.